

Celery via Azure Service Bus: a 5-Step Guide
Here's a little secret. I like hanging out on LinkedIn and chatting to strangers about Celery. Sometimes it's a coincidence, sometimes I creepily sneak up on people I have come across on podcasts or blog posts.
A couple of days ago I was chatting to a friendly chap over in Chicago. And he was telling me that he ran some Celery ETL jobs via Azure Service Bus.
This made me curious. I was just finishing an article about Amazon SQS as a Celery broker and it would be interesting to compare SQS against Azure Service Bus.
Service Bus Queues and Topics
Azure Service Bus is a cloud-based, fully managed message broker provided by Azure, the Microsoft cloud computing platform. The Azure Service Bus cloud service uses the AMQP 1.0 protocol as its primary means of communication. Azure provides two messaging patterns:
Queues offer First In, First Out (FIFO) message delivery to one or more competing consumers. Only one message consumer receives and processes each message.
Topics provide a one-to-many form of communication in a publish and subscribe pattern. Publisher sends a message to a topic and one or more subscribers receive a copy of the message.
In this article, I will be using queues. I did not manage to get topics working even though Celery's messaging library kombu suggests otherwise. If you know more, please comment below 👇.
Costs
Azure Service Bus offers three pricing tiers: Basic, Standard and Premium. The Basic plan offers shared capacity and pricing is based on usage at USD 0.05/1 million ops/month. The Premium plan includes dedicated capacity at a fixed price, around USD 668/month.
Step 1: Create a Service Bus Namespace
Head over to the Microsoft Azure Portal, search for Service Bus and create a namespace. A namespace defines the scope for addressing Service Bus resources within your application.
For example, you can use your application name to scope all queues used within your application. Click "Review + create" which takes you to the review page. Click "create" to continue.

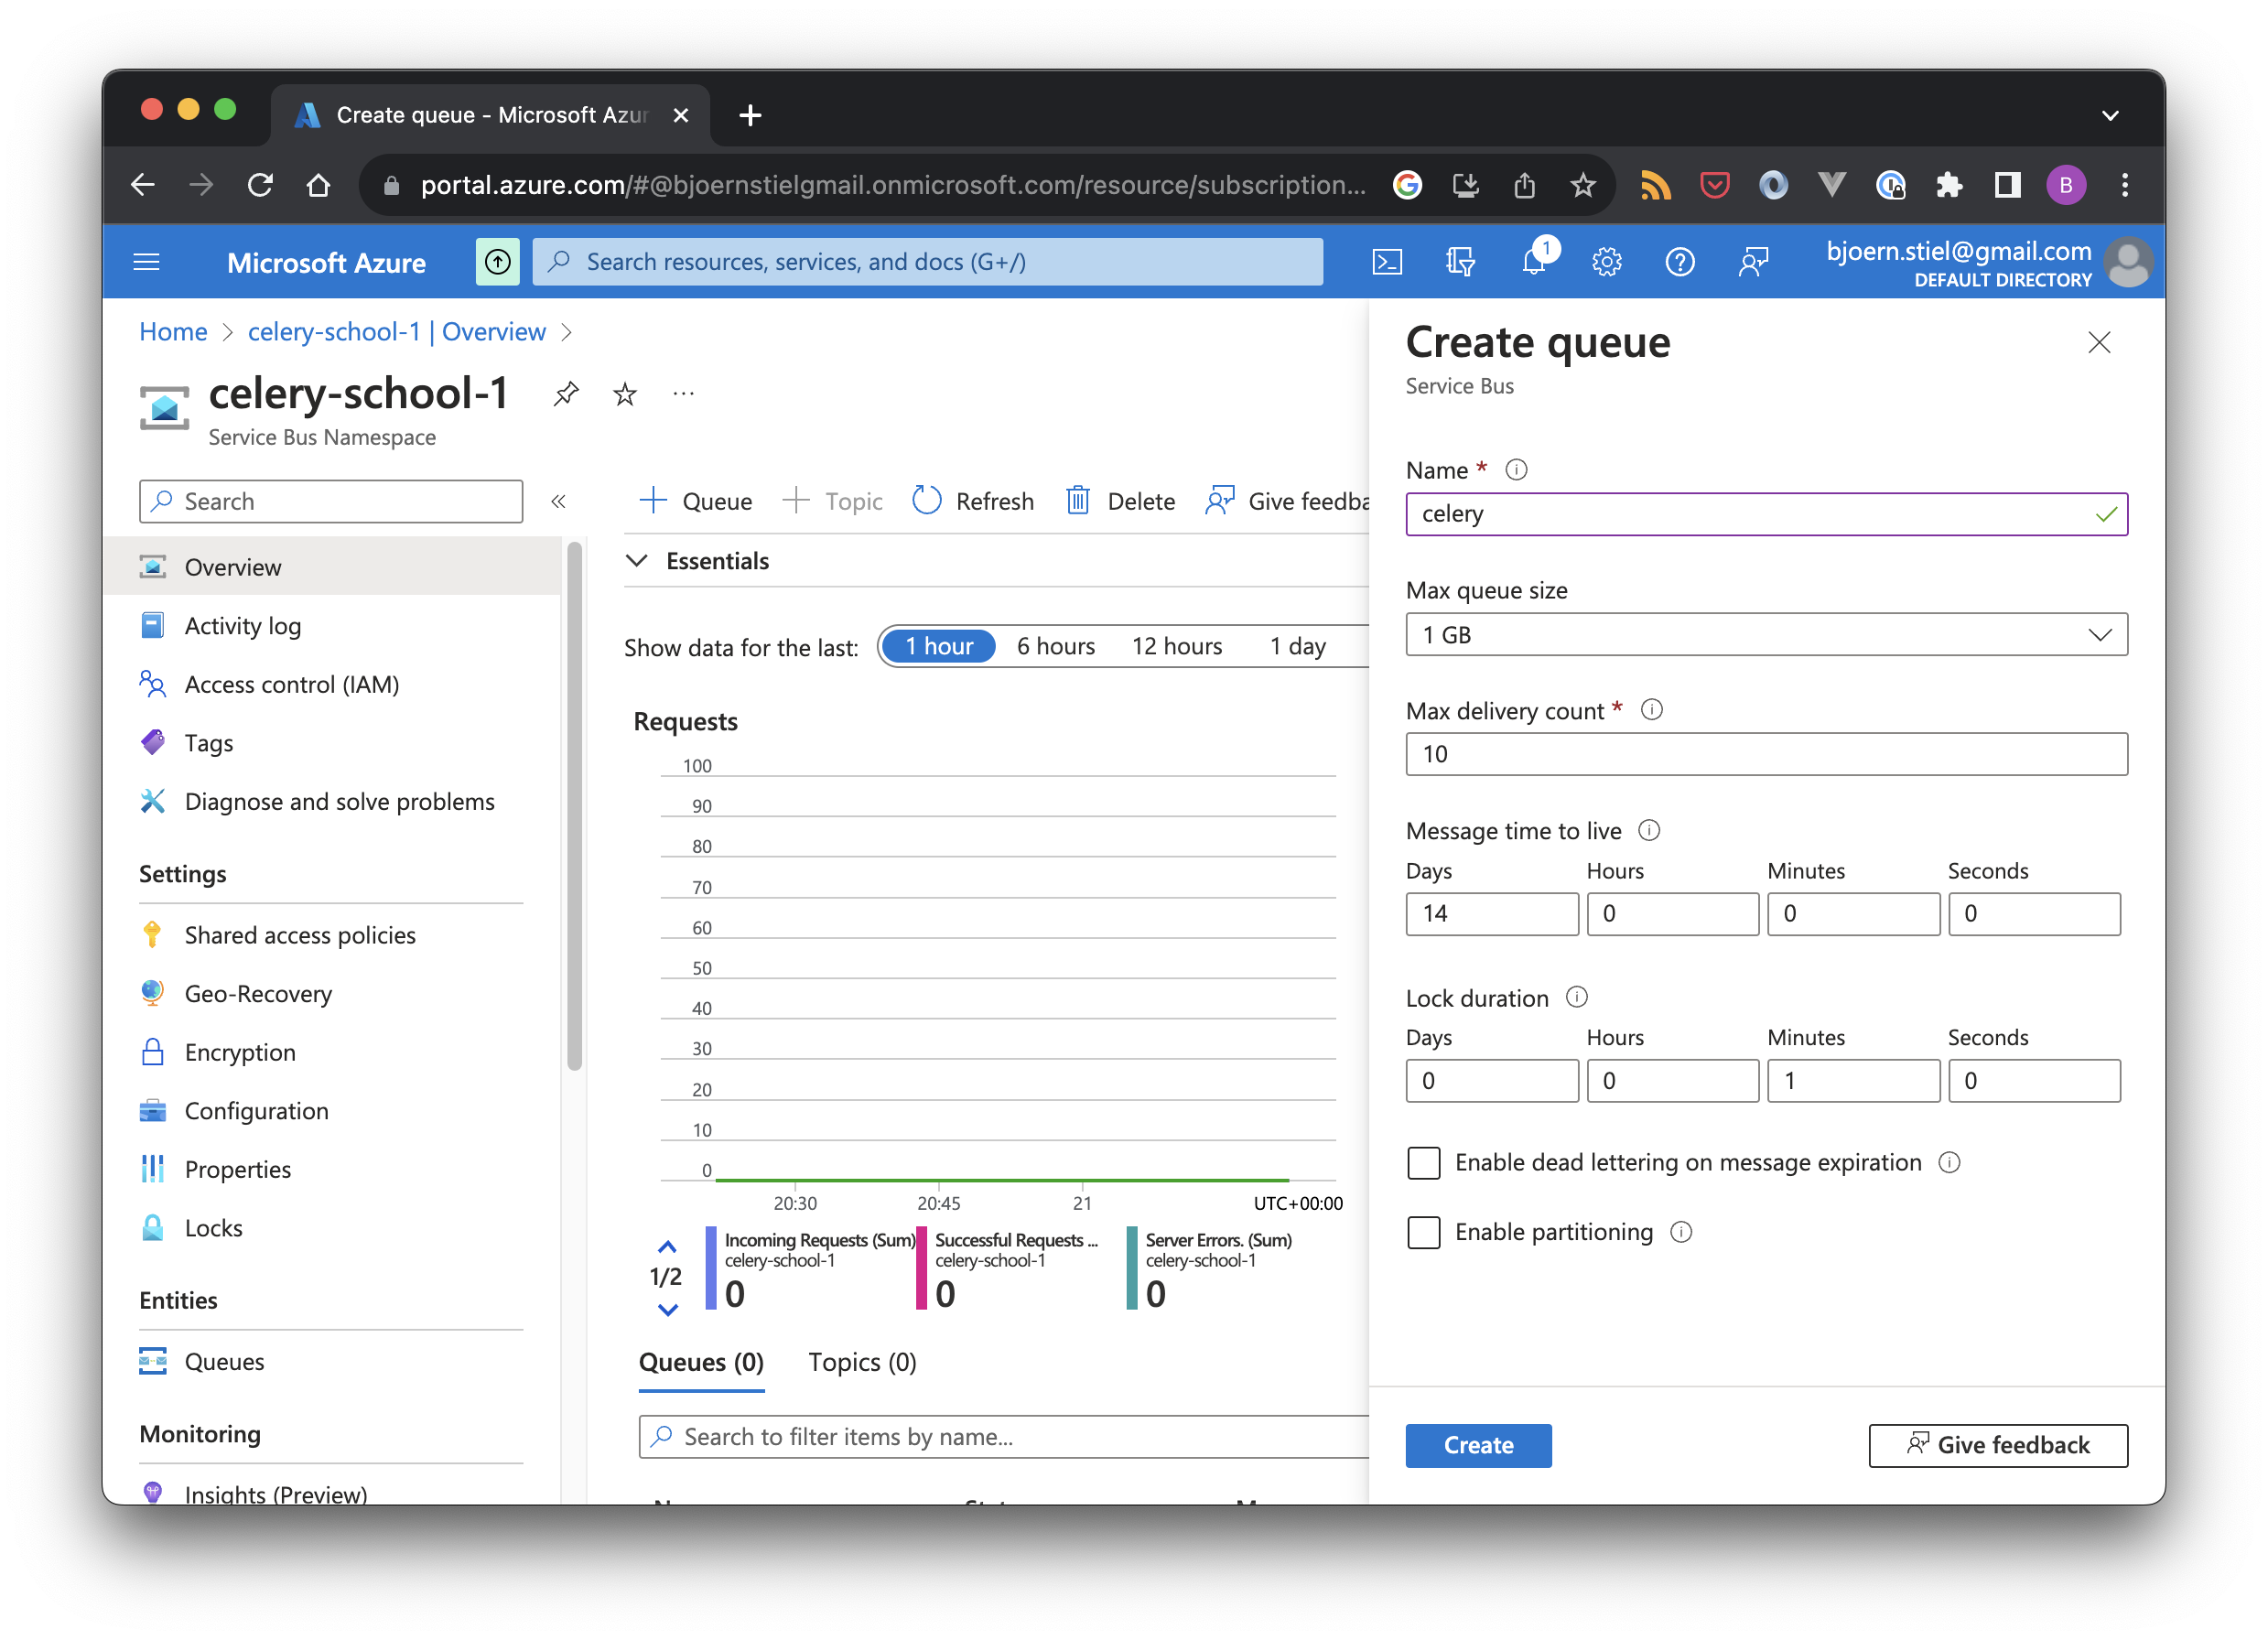
Step 2: Create a Queue
Create a queue as soon as the namespace is provisioned. The provisioning process can take a minute or so. Select a name for the queue, and leave the settings as they are. Make a note of the namespace which you will need for the Celery config.
Step 3: Credentials
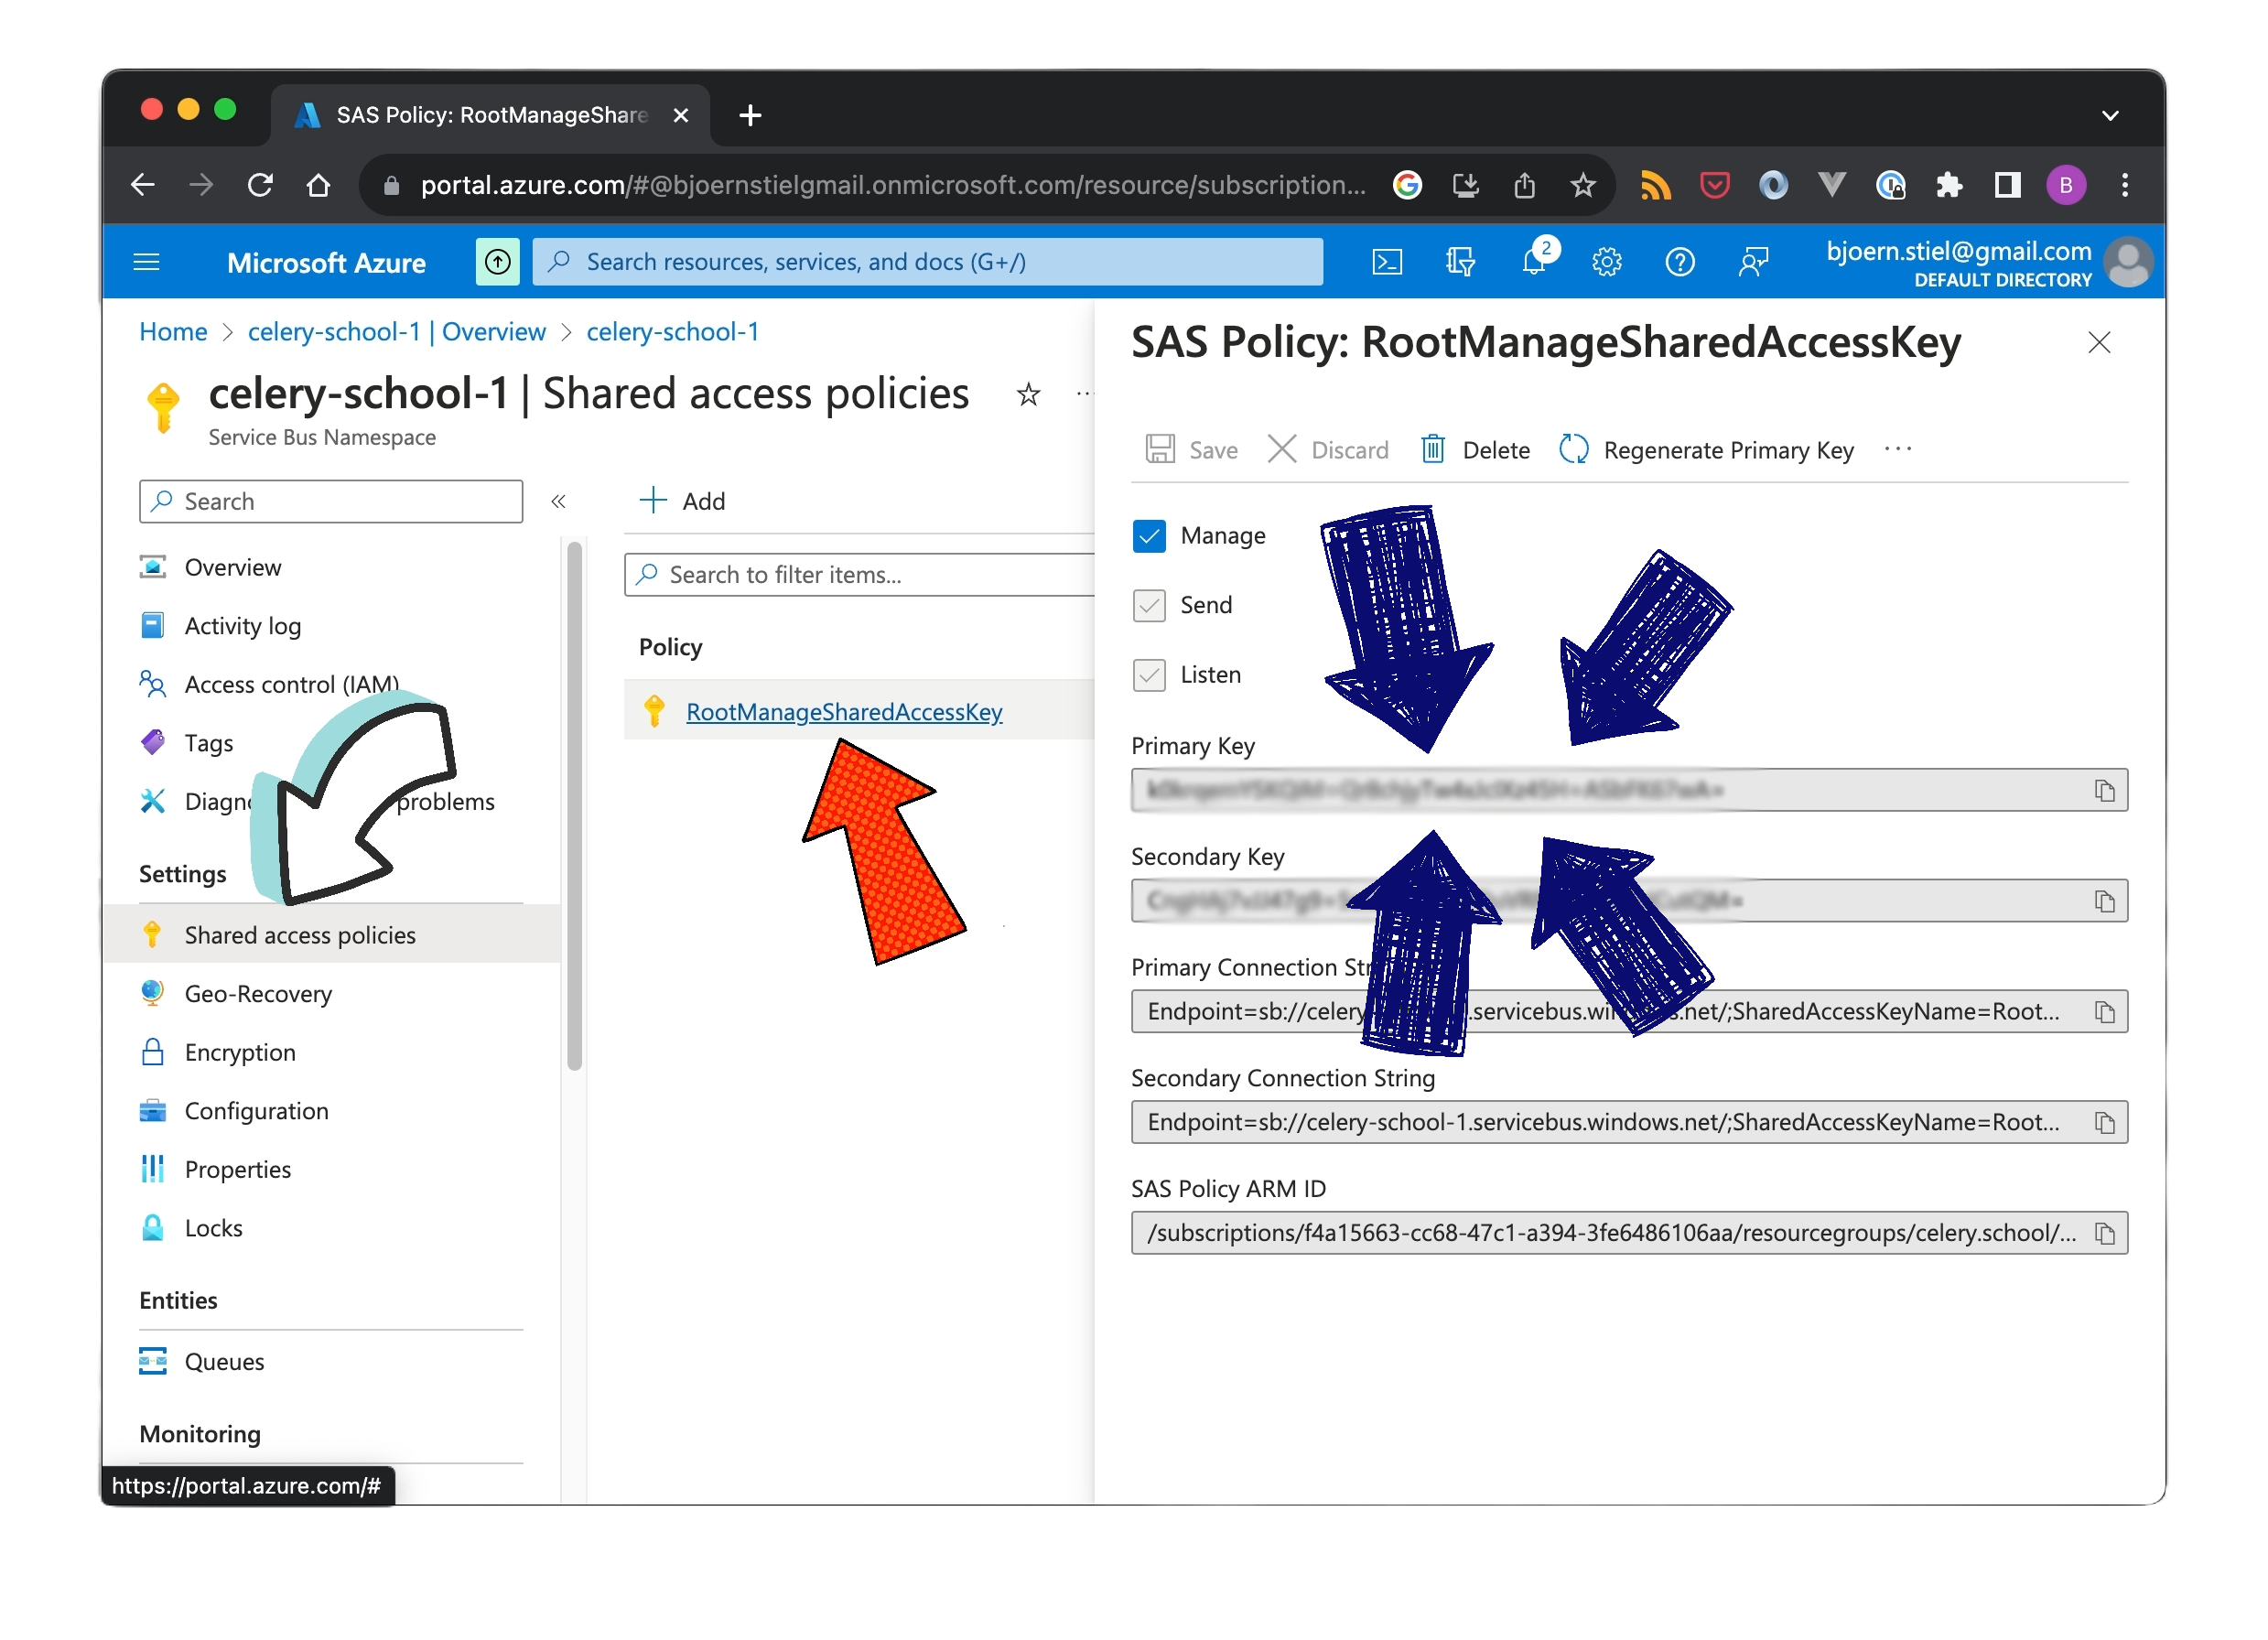
Get the credentials, by following the arrows in the screenshot below. Please note that Microsoft does not recommend Shared access policies. However, it is safe and simple enough for this tutorial. Make sure that all three claims are selected: Manage, Send and Listen. Copy the Policy name and the Primary Key. You will need them for configuring Celery.
Step 4: Install pip packages
You are now done in the Azure Portal. Apart from Celery, and anything else you might need, install these two pip packages:
azure-servicebus
azure-identity
$ pip install azure-servicebus azure-identity
Step 5: Configure Celery
The last step is the Celery configuration. In its most basic form, Celery needs the namespace, Shared Access Policy name and the Primary Key.
from celery import Celery

sas_policy_name = "RootManageSharedAccessKey"
sas_key = "..."
namespace = "..."

app = Celery(
    "app",
    broker_url=f"azureservicebus://{sas_policy_name}:{sas_key}@{namespace}"
)
Start the worker, passing the queue argument to make the Worker consume from the celery queue. This should match the Azure Service bus queue name you created in Step 2. Start the Celery worker and you are in business!
$ celery --app=worker.app worker --queue=celery
Additional Config Options
You can fine-tune Celery using the broker_transport_options dictionary.
from celery import Celery

sas_policy_name = "RootManageSharedAccessKey"
sas_key = "..."
namespace = "..."

app = Celery(
    "app",
    broker_url=f"azureservicebus://{sas_policy_name}:{sas_key}@{namespace}"
    broker_transport_options={
        "queue_name_prefix": "...",
        "wait_time_seconds": 5,
        "peek_lock_seconds": 60,
        "uamqp_keep_alive_interval": 30,
        "retry_total": 3,
        "retry_backoff_factor": 0.8,
        "retry_backoff_max": 120
    }
)
queue_name_prefix: string prefix to prepend to queue names in a service bus namespace; whentask_create_missing_queues=True(or omitted), this auto creates queues (in which case you can skip Step 2) and prepends the queue names with the string prefixwait_time_seconds: number of seconds to wait to receive messages, defaults to 5 secondspeek_lock_seconds: number of seconds the message is visible for before it goes back into the queue and gets sent to another consumer; defaults to 60 secondsuamqp_keep_alive_interval: interval in seconds the Azure uAMQP library should send keepalive messages; defaults to 30 secondsretry_total: Azure SDK retry total; 3 retries by defaultretry_backoff_factor: Azure SDK exponential backoff factor; default is 0.8retry_backoff_max: Azure SDK retry total time; defaults to 120 seconds
I hope this article was useful. Thanks for reading, and special thanks to my Chicago LinkedIn connection for the inspiration.
If you have any questions, please comment below👇.


