
Happy User, Happy Life: Real-Time Celery Progress Bars With FastAPI and HTMX
Imagine this: You are interacting with a web app where you upload an Excel workbook. When the upload is finished, the app lets you browse the workbook content, its version history and shows you the diffs between versions.
Deep down in the engine room, invisible to you, some heavy lifting is required between the “finished uploading” and the “I can do stuff” part. The workbook needs to be serialised. This can take anything from a few seconds to a couple of minutes.
And that’s a frustrating user experience if you, as the user, have no idea how much longer you have to wait before you can navigate and explore the workbook you’ve just uploaded.
This was the case with the app where I am the technical partner. Until recently, we would indicate that something’s happening in the background by showing the user a “processing” status badge without any further information.
We’ve created a much better user experience now, showing a progress bar which tracks the status of the Celery task. Delivering real-time updates from deep down in the engine room to the user’s browser.
In this article, I’m going to explain how we did it and how you can use the same concept to create a great user experience when dealing with long running Celery tasks.
The stack I’m using in this article:
Celery
FastAPI
server-side rendering with Jinja2 templates
htmx to partially update the HTML
Redis as a message broker and pub/sub backend
With a few adaptions you can use the same concept if you are using Django, Flask or other web frameworks. The underlying concept is independent of the framework you are using.
Measure Progress in Celery Tasks
The first step is to measure progress inside your Celery task. Progress is 0 at the beginning and 1 at the end of the task.
@app.task
def task():
    # start
    progress = 0
    ...
    progress = 1
    # end
In my case, the Celery task traverses a loop with a known number of iterations:
@app.task
def task():
    progress = 0
    n = 100
    progress_step = 1/n
    for i in range(n):
        ...
        progress += 1/n
Now, instead of being stuck at 0 and then jumping to 1, progress is more granular. It isn’t necessarily linear in time though. For example, one step can take half a second and the next can take 30 seconds. It still gives a correct indication of progress. As long as you can break your task into multiple steps, you are able to quantify progress.
Record Progress
Ultimately, our goal is to make this progress information available to the user. This means, it needs to be available to the web server process. So we need to persist it somewhere, for example a database. To keep things simple for this article, I use Redis and write progress to the “progress” key:
import redis

...
db = redis.from_url("redis://localhost:6379/1")
...

@app.task
def task():
    progress = 0
    n = 100
    progress_step = 1/n
    for i in range(n):
        ...
        progress += 1/n
        db.set(“progress”, progress)
User Interface
By now, we have a Celery task that measures and records progress in real-time. I am now turning our attention to the user interface, where we want to show the recorded task progress as a progress bar. I use FastAPI as my web framework and my FastAPI app does three things:
serve
index.html(GET /)get the current progress from Redis and serve the progress bar as an html snippet (
GET /progress)start the Celery task (
POST /start)
from fastapi import FastAPI, Request
from fastapi.templating import Jinja2Templates
from worker import task
import redis

fastapi_app = FastAPI()
templates = Jinja2Templates(directory="templates")
db = redis.from_url("redis://localhost:6379/1", decode_responses=True)

@fastapi_app.get("/")
async def index(request: Request):
    return templates.TemplateResponse(
        "index.html", {"request": request}
    )


@fastapi_app.get("/progress")
async def progress(request: Request):
    progress = 100 * float(db.get("progress") or 0)
    return templates.TemplateResponse(
        "partials/progressbar.html", {"request": request, "progress": progress}
    )

@fastapi_app.post("/start")
async def start(request: Request):
    db.set("progress", 0)
    task.s().apply_async()
Start the FastAPI app via uvicorn:
uvicorn main:fastapi_app --reload --port=8000
htmx
I use htmx to give me access to modern browser features directly from HTML, rather than using javascript. htmx is probably the most exciting, and boring, frontend tech I’ve seen in a while. I like boring because it implies simplicity.
With htmx, the server responds with HTML and not JSON. This allows you to directly swap out html elements, without having to deal with client-side models and renderers.
The FastAPI app serves index.html on its root. index.html is a simple html page that loads the bootstrap and htmx libraries and provides some simple html layout. It also comes with a start button that uses htmx to send a POST request to /start and instructs it to do nothing with the server response via the hx-swap: "none" attribute.
<button type="button" class="btn btn-primary" hx-post="/start" hx-swap="none">Start</button>
Progress Bar
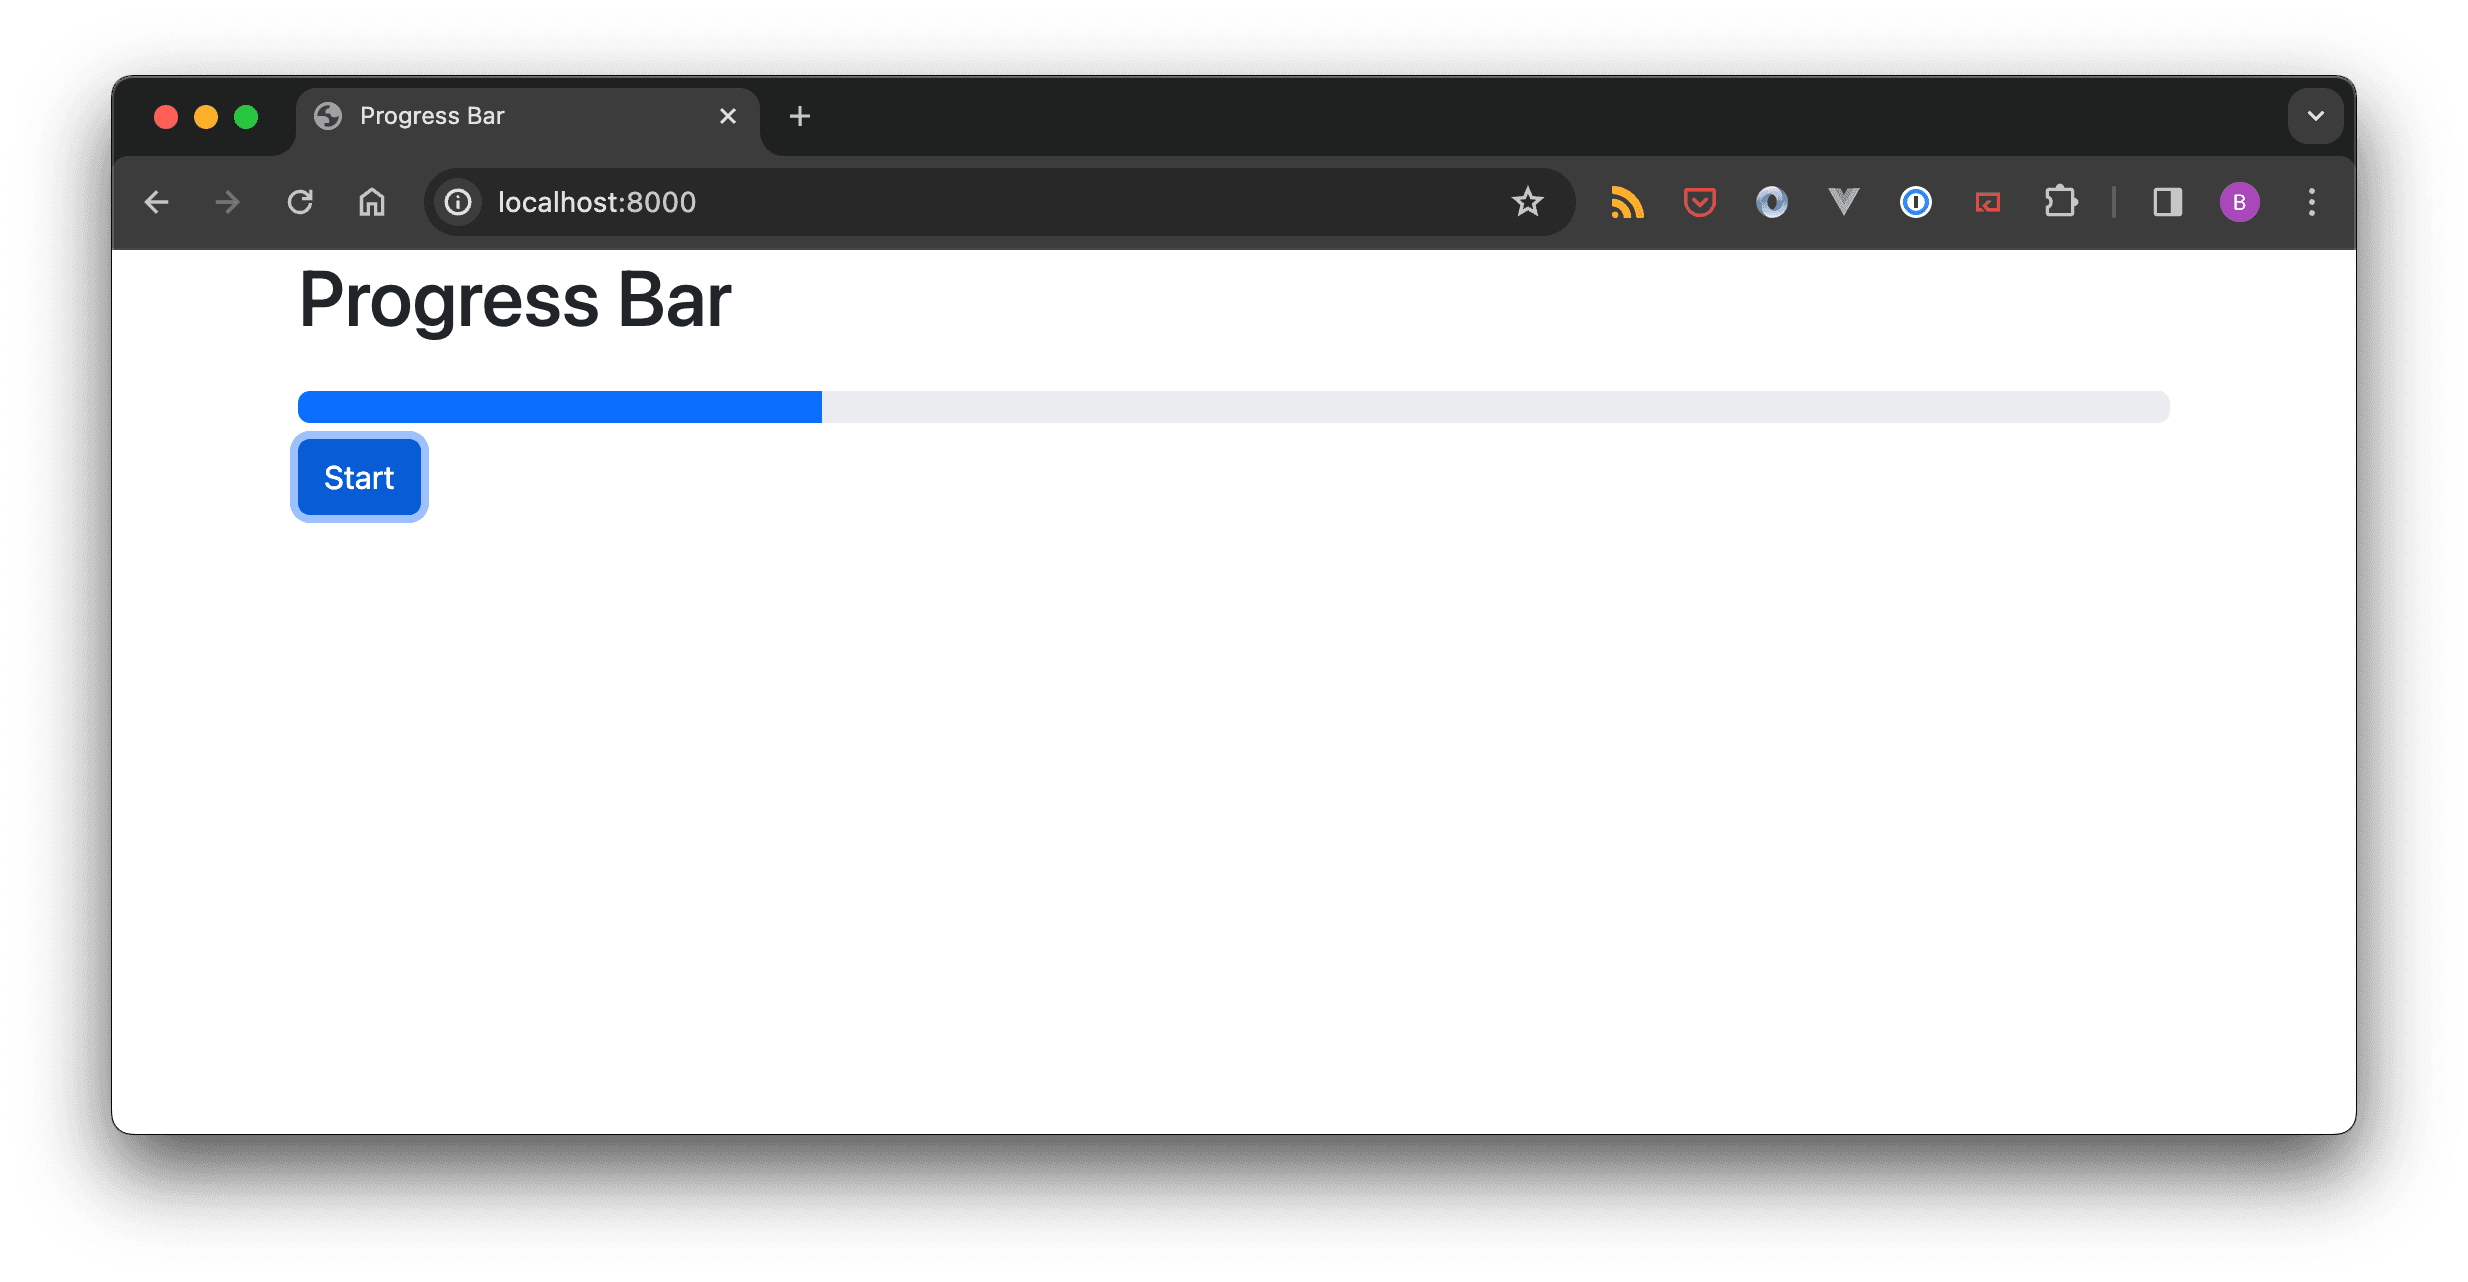
When you load the page in your browser for the first time, you will see an empty progress bar.

Interestingly, there is no trace of the actual progress bar in index.html, only the progress bar’s outer div.
<div class="col">
  <h1 class="mb-4">Progress Bar</h1>
  <div
  class="progress"
  role="progressbar"
  hx-get="/progress"
  hx-trigger="load",
  hx-target="this"
  hx-swap="innerHTML">
  </div>
</div>
How does this work? On page load, the htmx instruction hx-trigger="load" in combination with hx-get="/progress"makes htmx send a GET request to /progress. The server responds with the html snippet for the progress bar and htmx replaces the inner html of the div because of hx-swap="innerHTML". When the page loads and no progress has been recorded, the /progress endpoint returns:
<div class="progress-bar" style="width: 0%"></div>
htmx swaps this for the previosuly empty inner div, so that the rendered html now looks like this:
<div class="col">
  <h1 class="mb-4">Progress Bar</h1>
  <div
  class="progress"
  role="progressbar"
  hx-get="/progress"
  hx-trigger="load",
  hx-target="this"
  hx-swap="innerHTML">
      <div class="progress-bar" style="width: 0%"></div>
  </div>
</div>
Real-time Progress Bar Updates
So far we have:
a Celery task that calculates its own progress and writes it to Redis
a FastAPI controller that reads the task progress from Redis and returns it as a progress bar HTML snippet
an HTML page that loads the progress bar via htmx
and a button to kick off the Celery task
With this, we can start the long-running Celery task via the start button and track its progress. Unfortunately, the only way to refresh the progress bar is to manually reload the browser.
What we are missing for a self-updating, real-time progress bar are server-side triggered events. Similar to hx-trigger="load", we need the Celery task to trigger an event that makes the UI reload the progress bar.
socket.io Server
socket.io enables real-time communication between a web browser and a server. We do already have a communication link between the browser and the FastAPI app, we need to figure out how to
establish a socket.io connection between the web server and the browser
how to get the Celery task to notify the web server of an update
how to get the web server relay the event to the browser
Let’s start with the socket.io connection between the browser and the web server. Up until now, we only had a FastAPI process running via uvicorn. For this two-way communication between server and browser, we also need a socket.io process:
import socketio

# socketio
socketio_server = socketio.AsyncServer(async_mode="asgi")

# fastapi
fastapi_app = FastAPI()

# socketio + fastapi app
socketio_app = socketio.ASGIApp(
    socketio_server=socketio_server,
    other_asgi_app=fastapi_app)
Instead of uvicorn running fastapi_app, we will have it running socketio_app.
uvicorn main:socketio_app --reload --port=8000
socketio_app dispatches socket.io-related traffic to socketio_server ("socketio_server") and forwards unrelated HTTP traffic to fastapi_app ("other_asgi_app").
socket.io Client
Client-side, I use htmx.trigger to bridge incoming socket.io to events, that htmx can act on.
<script>
    var socket = io();
    socket.on("trigger-event", (data) => {
        htmx.trigger(document.body, data.event);
    });
</script>
Here, I tell the socket.io client to listen for trigger-event events - that come with a payload event property - and use that to trigger an event on the HTML document's body element.
Why am I doing this? Remember how the progress bar is loaded into the inner div on page load, using the hx-trigger="load" attribute? And how we want to do the same - trigger a reload of the progress bar - on task progress updates? Imagine the socket.io client receives an event like this:
"trigger-event", {"event": "progress"}
If we now extend thehx-trigger to also react to the progress event from the body element like so
<div class="col">
  <h1 class="mb-4">Progress Bar</h1>
  <div
  class="progress"
  role="progressbar"
  hx-get="/progress"
  hx-trigger="load, progress from:body",
  hx-target="this"
  hx-swap="innerHTML">
  </div>
</div>
we will have achieved exactly that: a reload of the progress bar.
Emit events from Celery
The last missing piece in the puzzle is emitting the trigger-event, {"event": "progress"}event from Celery. socket.io comes with support for Redis for event sharing across multiple processes via Redis Pub/Sub mechanism via socketio.RedisManager. This breaks the problem down into two:
emit an event via Redis Pub/Sub from Celery
relay the Redis Pub/Sub event to the browser via the socketio server
To emit the trigger-event of type progress after each Celery progress update:
import socketio
...

# redis pub/sub manager
redis_manager = socketio.RedisManager(
    "redis://localhost:6379",
    write_only=True)

@app.task(bind=True)
def task(self):
    n = 10
    for i in range(n):
        ...
        redis_manager.emit(
            event="trigger-event",
            data={"event": "progress"})
        ...
To relay the event from Redis Pub/Sub to socketio, we use socket.io's server client_manager. The client_manager plays a crucial role in synchronising client information across different server instances. It helps keeping track of connected clients, handling disconnects, and ensuring that events are properly propagated among different servers:
import socketio

# redis pub/sub manager
redis_manager = socketio.AsyncRedisManager(
    "redis://localhost:6379")

# socketio
socketio_server = socketio.AsyncServer(
    async_mode="asgi",
    client_manager=redis_manager)

# fastapi
fastapi_app = FastAPI()

# socketio + fastapi app
socketio_app = socketio.ASGIApp(
    socketio_server=socketio_server,
    other_asgi_app=fastapi_app)
Note that Celery is synchronous Python and uses socketio.RedisManager, whereas ASGI, FastAPI and Socketio are asynchronous Python and use socketio.AsyncRedisManager.
Conclusion
And that gives us a full round trip:
the Celery task writes its progress to the db
it emits an event via Redis' Pub/Sub
the emitted event is relayed via the socket.io server
the incoming socket.io event triggers an event on the body
htmx reacts to this event and reloads the progress bar
I hope you enjoyed this article as much as I did improving the user experience in our app.
The full source code is available on GitHub.
Any questions, please drop me an email: bjoern.stiel@celery.school